
Linked Helper allows users to send both simple prefabricated messages and more complex customizations that you may find a little challenging. Built-in variables are easy to use, but in some cases you may need to tweak the IF-THEN-ELSE functions.
To get started, you can try adding custom variables to your CRM, Campaign, or Action. This is a simple task that will allow you to manually write columns that contain particular values in an Excel file. The software will take the necessary values for each message recipient based on the given URL. That is, the messages will be unique for each recipient. Good news – you don’t have to write them manually for everyone!
Using the IF-THEN-ELSE function can be the next level up and will make your job a lot easier.
What is IF-THEN-ELSE in simple words?
- checks the presence – or absence – of a value in a variable, and then
- sends the correct message for either condition.
For example, your lead’s LinkedIn page may lack certain information for your variables (e.g., the company name {company} may not be specified). In this case, the IF-THEN-ELSE operator is needed. Because the message template will be as personalized as possible for those contacts where the information is given, but at the same time there will be a standard version of the message if the information is not found.
Working with the IF-THEN-ELSE operator step by step
Next, we will take a closer look at what it’s worth getting started with the IF clauses. We’ll cover how to add custom variables, but you can start by setting up the operator with built-in variables.
How to quickly research and parse your leads’ profiles
You can visit thousands of profiles through Linked Helper, and the software will collect data from the profiles. You can use data such as their bio text to create a custom column for personalization.
For parsing the data, you can use various actions – Visit & extract,” “Auto invite,” and “Like and comment post or article.”
After visiting profiles and parsing, you can download a file with leads, where their emails will also be saved. In the downloaded file, you can add columns with variables that you will later use in your campaigns.
- To download data, you can go to the campaign.
- Open the Lists tab (number 1 on the screen below).
- Check the box for the number of leads. (number 2 on the screen)
- After selecting all the leads, click the Download button. (number 3 on the screen)

Research and personalization for outreach are essential steps, so through the software, you can complete several important tasks at once. At the same time, you will not waste time manually searching and copying information in the software.
Learn more about what data you can scrape from LinkedIn pages in the blog post.
How to add custom variables
In addition to the variables that are already set by default in the social tool, you can create your own, which gives more opportunities for personalization. With custom variables, you can create targeted messages for each audience and message campaign.
Note: If the profiles are not in your network, the emails will not be scraped. If you need to collect emails of 2nd and 3rd degree contacts, they must be visited with the “Visit and Extract” action with the “Extract emails from Snov.io” option enabled, or processed in the “Find profile emails” action.
You can add custom variables for the entire CRM, a single campaign, or a single action. But it is important that the variables will work only with those user URLs that are listed in the table with those variables.
To add custom variables:
- Download the file with the leads you have parsed.
- Add a column or several with variables. The beginning of the column name should be “cs_variable name” (without quotes), for example cs_event.
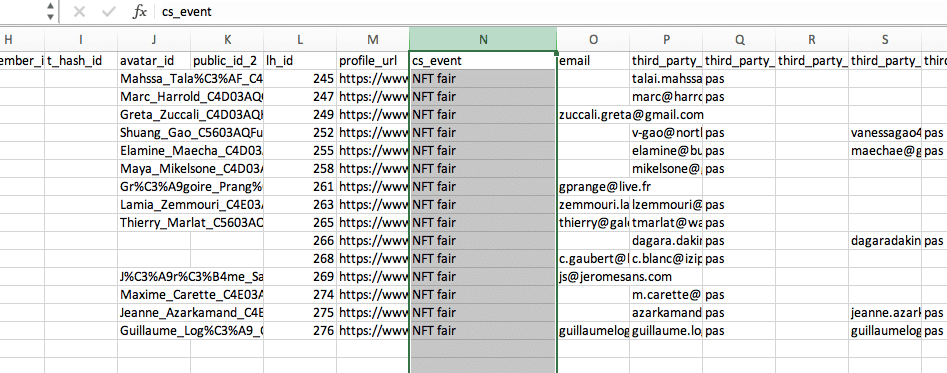
- Save and add the file to the CRM or campaign. If you need to apply a variable for one campaign, you can add a file by going to the desired campaign – Lists – Custom fields.

After a quick load, you will see in the Message template editor PRO the variable that you have written in the file.
You can learn detailed settings for adding variables in the knowledge base article.
How to set up an IF function
We have written exact settings in the knowledge base – How to create message templates.
Important: to work with operators, you need to activate the advanced interface. Open Settings → Interface → Advanced UI.
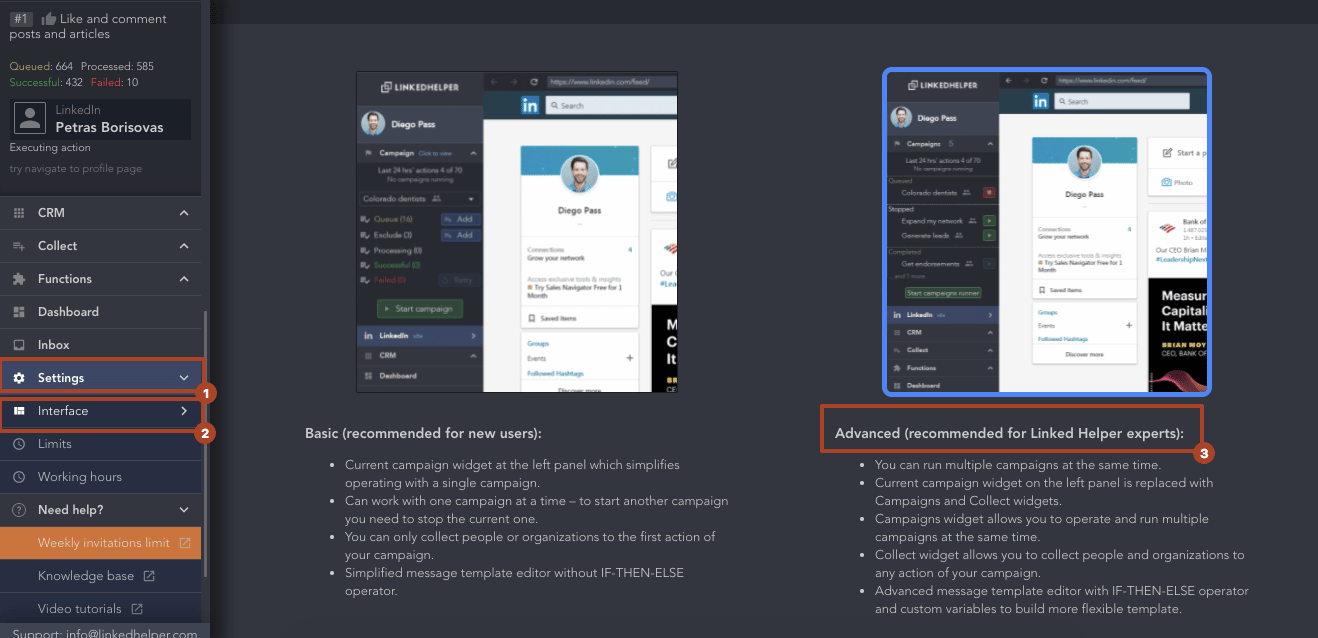
After that, in the Template Builder, you will see the desired button, where you can enter variable values and texts for message options.
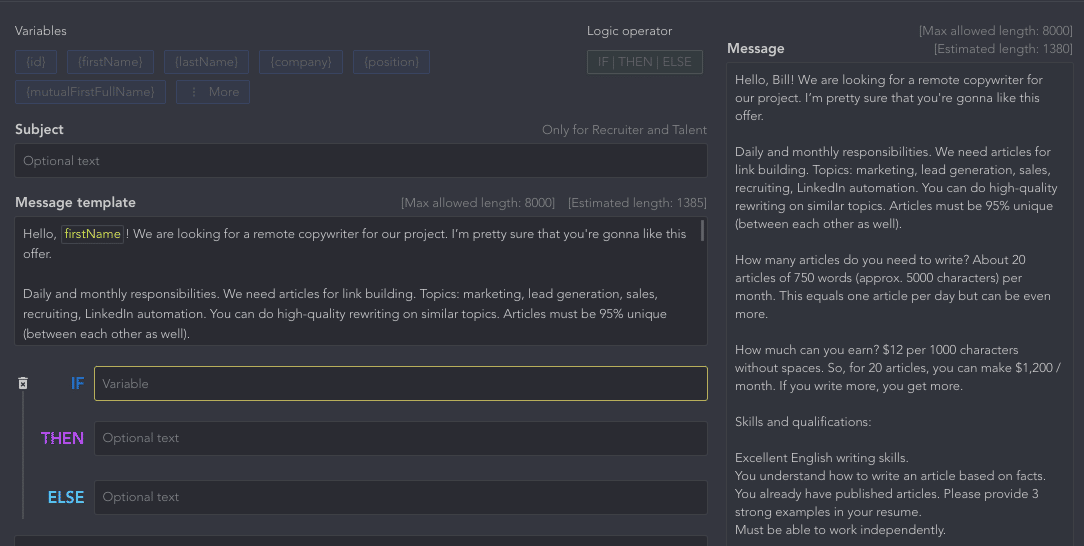
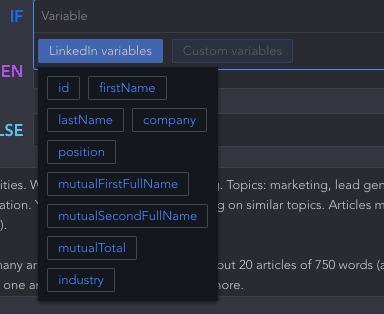
IF line – Here you need to add a variable. It can be the default LinkedIn variable, or it can be set by you in the software. As we explained above, it is easy to add by uploading an Excel file. There can only be one value here.
THEN line – Here you need to register a variant of the message using the variable. The software will find the value and substitute it in the text.
In the THEN line, the use of the found variable is optional. It may not be present in the line, and you can paste any text that is needed.
ELSE line – Here you need to enter an alternative variant, which will be sent if there is no value for the variable.
You can use logical operators for both invite messages and private messages and InMails. In the first case, the length of the message text cannot exceed 300 characters.
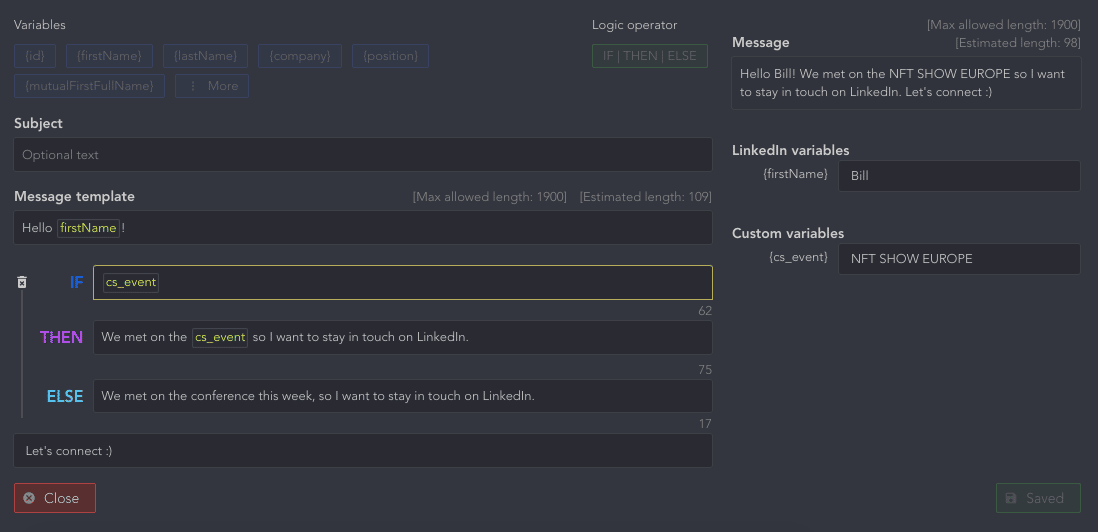
For example, we met with leads at different events and now we want to find everyone and add them to our network.
We could visit 3 events, where we met 90 leads – 30 at each event. Now we want to send the same message where the only difference is in the name of the event. Here a custom variable is your best bet.
To do this, we downloaded the file from their URL and added a “cs_event” column. Therefore, when the software sees this column and a value for it, it uses the THEN string. If there are leads in the queue for which there is no “cs_event” value, then the software will write a message variant from the ELSE line.
This is a simple and convenient example, but you can build more complex templates. Let’s look at some examples below.
Real use case of the IF operator
We will give a good example from one of our clients, which will help you better understand the function and quickly learn how to configure it.
The client wrote that he has a list of profiles collected for inviting with an “industry” column. He wanted to convert industry information into a custom field and set up a message template in one campaign so that he could send customized messages based on the industry variable.
That is, we had a custom “cs_industry” variable that could have different values. For example, “Information Technology & Services,” “Computer & Network Security”, and “Computer Hardware.” And for each target group of leads, the client wanted to send different versions of messages.
Linked Helper cannot change text based on the value itself, but only on the presence/absence of the value. Thus, we need to specify separate variables for several unique values. For example, we were able to easily modify the CSV file so that from one standard variable {industry} we got instead 3 custom variables – one for each industry, i.e. {cs_info_and_tech}, {cs_comp_hardware}, {cs_comp_and_net}.
Now, having three different variables in Linked Helper and the IF-THEN-ELSE function, we could compose a message so that the software will check in turn whether the lead has any variable and whether this variable has any value. If yes, then it send the correct option.
How the tool works step by step:
- Linked Helper checks if the lead has the first variable with a value.
- If both the variable and the value exist, then the variant under the first THEN is sent.
- If there is no variable, then the Linked Helper goes to check if the lead has the second variable.
- If there is a second variable, then the variant under the second THEN is sent.
- If there is no second variable, then the Linked Helper goes to check if the lead has the third variable.
- If there is a third variable, then the variant under the third THEN is sent.
- If there is no third variable, then the ELSE option is sent.
If cs_industry was “Computer & Network Security”:
I noticed you specialized in hiring the best talents in Computer & Network Security.
If cs_industry was “Information Technology & Services”:
We’ve been working in Information Technology & Services for almost 10 years.
If cs_industry was “Computer Hardware,” then the string variant should be:
To be honest, Computer Hardware is not where we have a lot of experience, but still we have specialists who can help you in this sphere.
What we did:
- We downloaded a file with leads that we had previously parsed for the campaign.
- We added three columns in the file, one for each variable. That is, when finding a value under one of the industries, the software will recognize this as a signal to send the desired string.
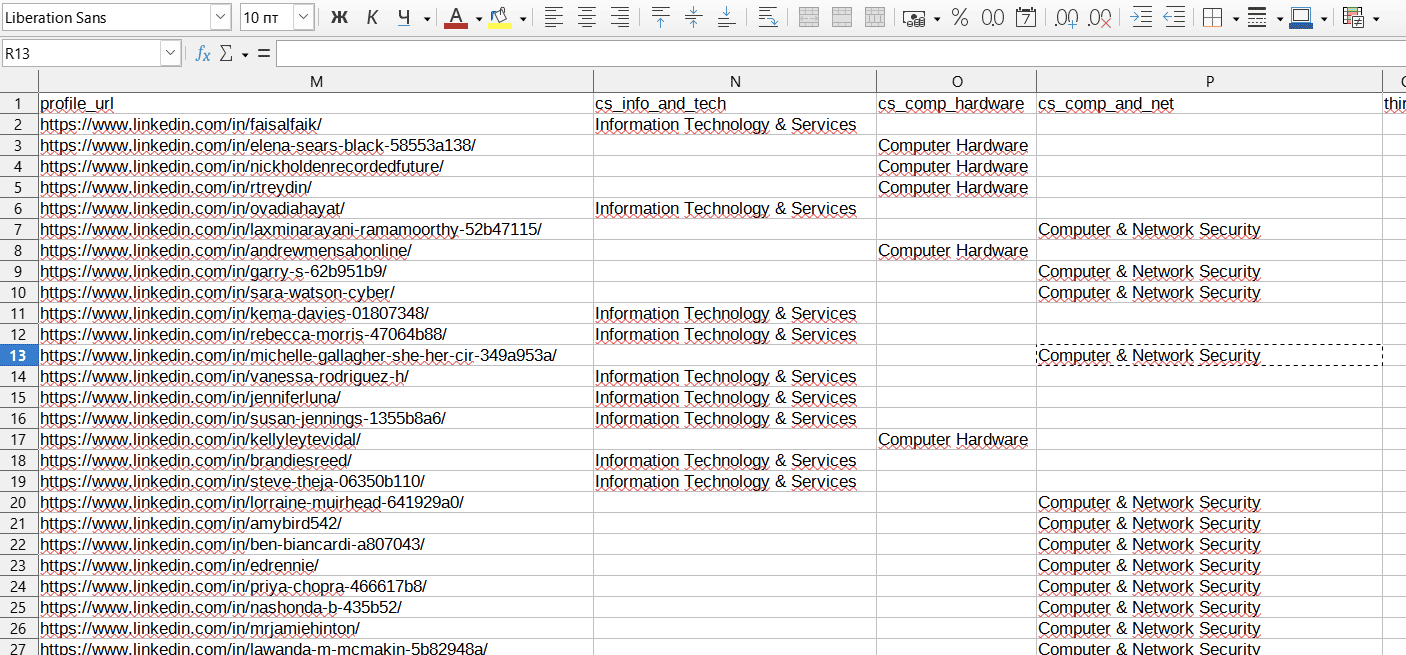
At the same time, it is not necessary to indicate the value (i.e., the industry name) in the column for each lead; any character found in the column will be considered by the software as the presence of the variable.
- We uploaded the file to the campaign. Next, we set up the message as in the example in the screenshot below.

As you can see from the screenshot above, we had the main IF condition, and we added two other message variations to the ELSE conditions. In the table, you do not need to write the value for the variable (for example, write “Information Technology & Services” in the cs_info_and_tech column), because you will write the values in the “Custom variables” section in the Linked Helper dashboard.
As a result, custom variables and logical operators allow you to make messages and mass mailings tailored to the recipients. For example, you can also make a custom greeting based on the gender of the recipient. See the knowledge base guide for more detailed and more complex examples that can be useful for your campaigns. The settings for such a mailing list are discussed in detail in the knowledge base.
You can try Linked Helper for free for 14 days and the trial version will help you collect lead data. Then you can try the premium subscription, which has a pro interface, and work with advanced logical operators.