InMails and direct messages are not interchangeable; they complement each other to enhance your sales pipeline. Sales pros use both strategies, but there is a significant yet impactful difference between them.
So, what are you supposed to start with if you want to get more leads from your LinkedIn outreach?
Let’s delve into the nitty-gritty so you can maximize your LinkedIn outreach efforts. As a bonus, you’ll also receive four pro hacks to boost your lead generation.
LinkedIn InMail vs. Regular LinkedIn message: What is the difference? Examples and use cases.
Both LinkedIn InMail and Regular LinkedIn messages allow you to initiate private communication with other users. Now, let’s understand what each means on LinkedIn.
LinkedIn InMail is a premium feature available with a Premium subscription or InMail credits. It enables users to send targeted personalized messages not only to their existing connections but also to 2nd and 3rd-degree connections.
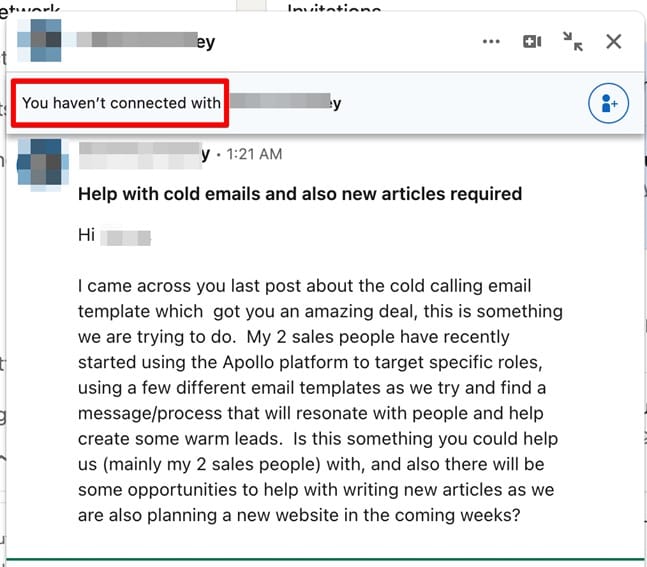
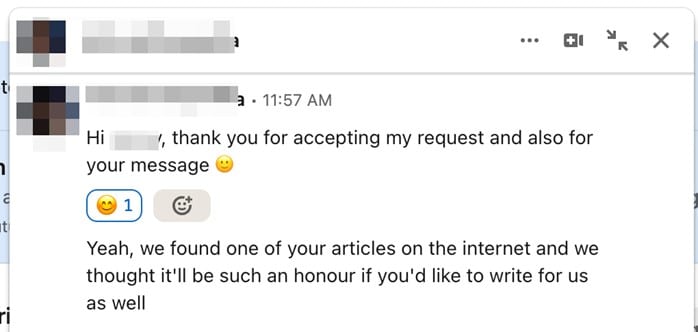
On the other hand, regular LinkedIn messages serve as the primary communication tool within the network. While they are free, there is a limitation—they can only be sent to your 1st-degree connections.
If you want to message someone outside your connection list, LinkedIn will suggest sending a connection request first. Once the request is accepted, you can initiate a conversation with that user.
Now, let’s break down their distinctive features:
| InMail | Regular message | |
|---|---|---|
| Pricing | Premium subscription | Free |
| Recipients | Everyone | 1st-degree connections |
| Subject line | Yes | No |
| Character limit | 2000 | 8000 |
| Automatic reminders | Within 3 days if there’s no response | No |
LinkedIn InMail: Cold outreach use cases.
How can you significantly enhance your cold outreach with LinkedIn InMail? Here are four use cases to consider.
To address an urgent need of a potential customer.
You’re scrolling your LinkedIn feed and notice your ideal customer comments or posts about problem X, but they are not in your LinkedIn connections.
Sending a connection request would be logical, but you must wait for (if) it is accepted. Conversely, InMails allow you to instantly reach out to the lead with a highly personalized outreach. Describe how your offering will solve the potential client’s pain points and invite them to engage in a more meaningful conversation.
This is a highly effective approach to grab your ICP’s attention without losing time on sending connection requests and waiting for users to accept them to initiate a private conversation.
To make warm connections with particular prospects.
Use LinkedIn InMail to cut the chase and reach out to your sought-after prospects to lay the foundation for future collaborations.
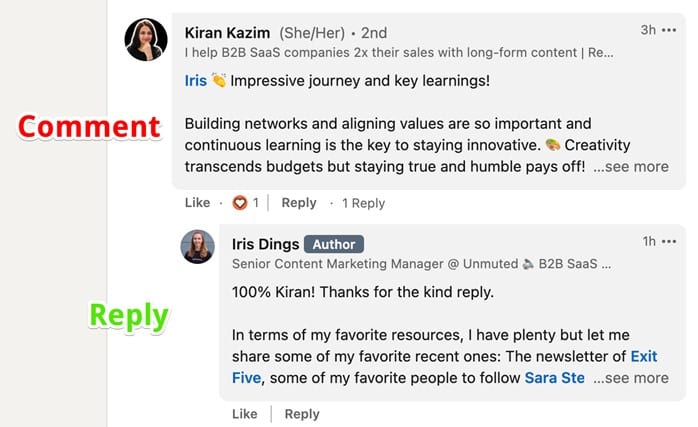
For example, you can piggyback on leads’ comments and leverage them as a starting point to make warm connections by emphasizing common interests or goals in your InMail. This will increase your chances of getting a positive response and move the lead further down your sales pipeline.
To achieve this, actively monitor the posts and comments of your target audience. Join industry-related groups, follow hashtags to engage in meaningful conversations, spot common ground, and craft a personalized InMail.In fact, personalized InMails perform about 15% better than ones sent in bulk.
To speed up job hunting.
One of the most common challenges that job seekers face is connecting with hundreds of HR professionals, recruiters, and decision-makers to send an application or gather information about job openings.
According to LinkedIn, Premium members are 2.6 times more likely to get hired on the platform. In this context, LinkedIn InMail can be a real game-changer for those who want to speed up job hunting with customized messages. Ensure to express genuine interest in the company and highlight your qualifications for the desired position.
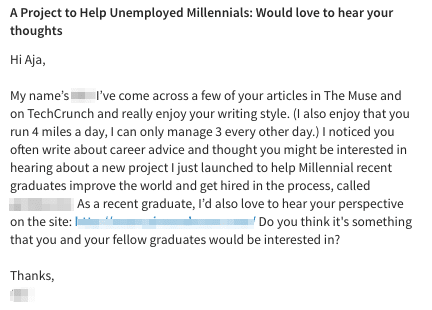
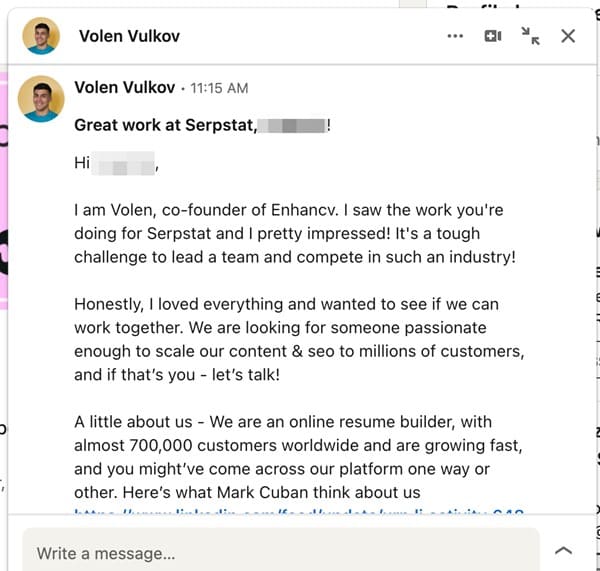
And vice versa — recruiters constantly combat the challenges of finding and enticing professionals with job opportunities. Below is an example of a founder reaching out to a candidate using InMail.
LinkedIn Message: Lead generation use cases.
Next, let’s talk about regular LinkedIn messages and explore two practical use cases.
To reach prospects in bulk.
When you have hundreds of LinkedIn accounts at your disposal, InMails are of no use. They’re for targeted outreach campaigns.
With regular messages starting from connection requests, you can reach thousands of prospects without worrying about InMail credits.
To save time on lead generation with LinkedIn outreach automation and bypass InMail credits.
LinkedIn connection requests and messages can be easily automated, even personalized with the right tools. The cherry on top, you can triple your outreach efforts by pairing InMails with regular messages. How? Both have weekly and monthly limits.
You can send only 100-250 connection requests weekly (or 400-1000/month). Likewise, monthly InMail messages allotment ranges from 5 to 50 messages. (More information on InMail credits in the following chapters).
Paired together, InMail and regular messages allow you to reach more prospects.
However, more messages come with more work.
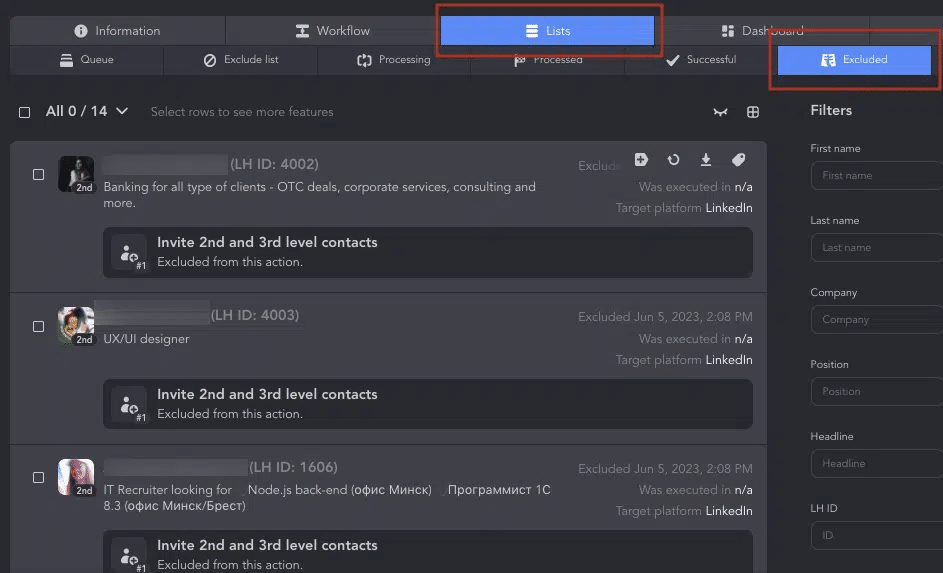
Linked Helper 2 allows you to automate almost everything:
- Sending out connection requests to your lead list.
- Inviting targeted 2nd and 3rd-level contacts with a personal note.
- Messaging group members and event attendees.
- Visiting profiles and liking posts before sending a connection request.
And much more.
So far, we have covered LinkedIn InMail and regular messages extensively, but the platform has much more to offer. There are sponsored InMails and message ads.
LinkedIn InMail vs. Sponsored InMail vs. Message Ads: What is the difference?
You might wonder about the distinction between these three. The answer is simple: two are essentially the same thing. Back in 2019, LinkedIn rebranded sponsored InMails, and since then, they have been known as Message Ads.
Here is how Message ads appear in LinkedIn Inbox:
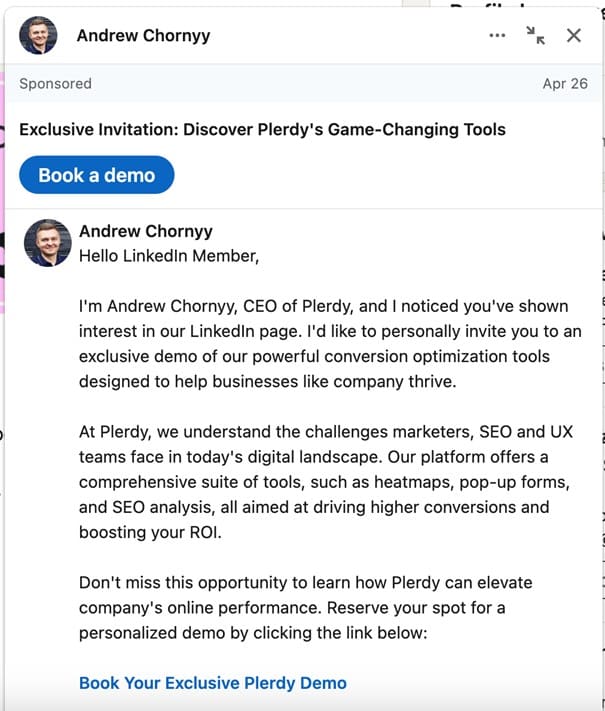
It contains CTA buttons and links in blue, a subject line, and a Sponsored label.
Granted, InMails is the go-to tool for LinkedIn outreach and social selling. Then, the next question arises: how many InMails can you send out?
Know LinkedIn InMail credit renewal and limitations guidelines.
LinkedIn InMail credits are included in all LinkedIn premium plans, including Premium Career, Premium Business, Sales Navigator Core, and Recruiter Lite. Credits and limits can vary depending on your LinkedIn account type.
The number of InMail credits for LinkedIn Sales Navigator and LinkedIn Recruiter.
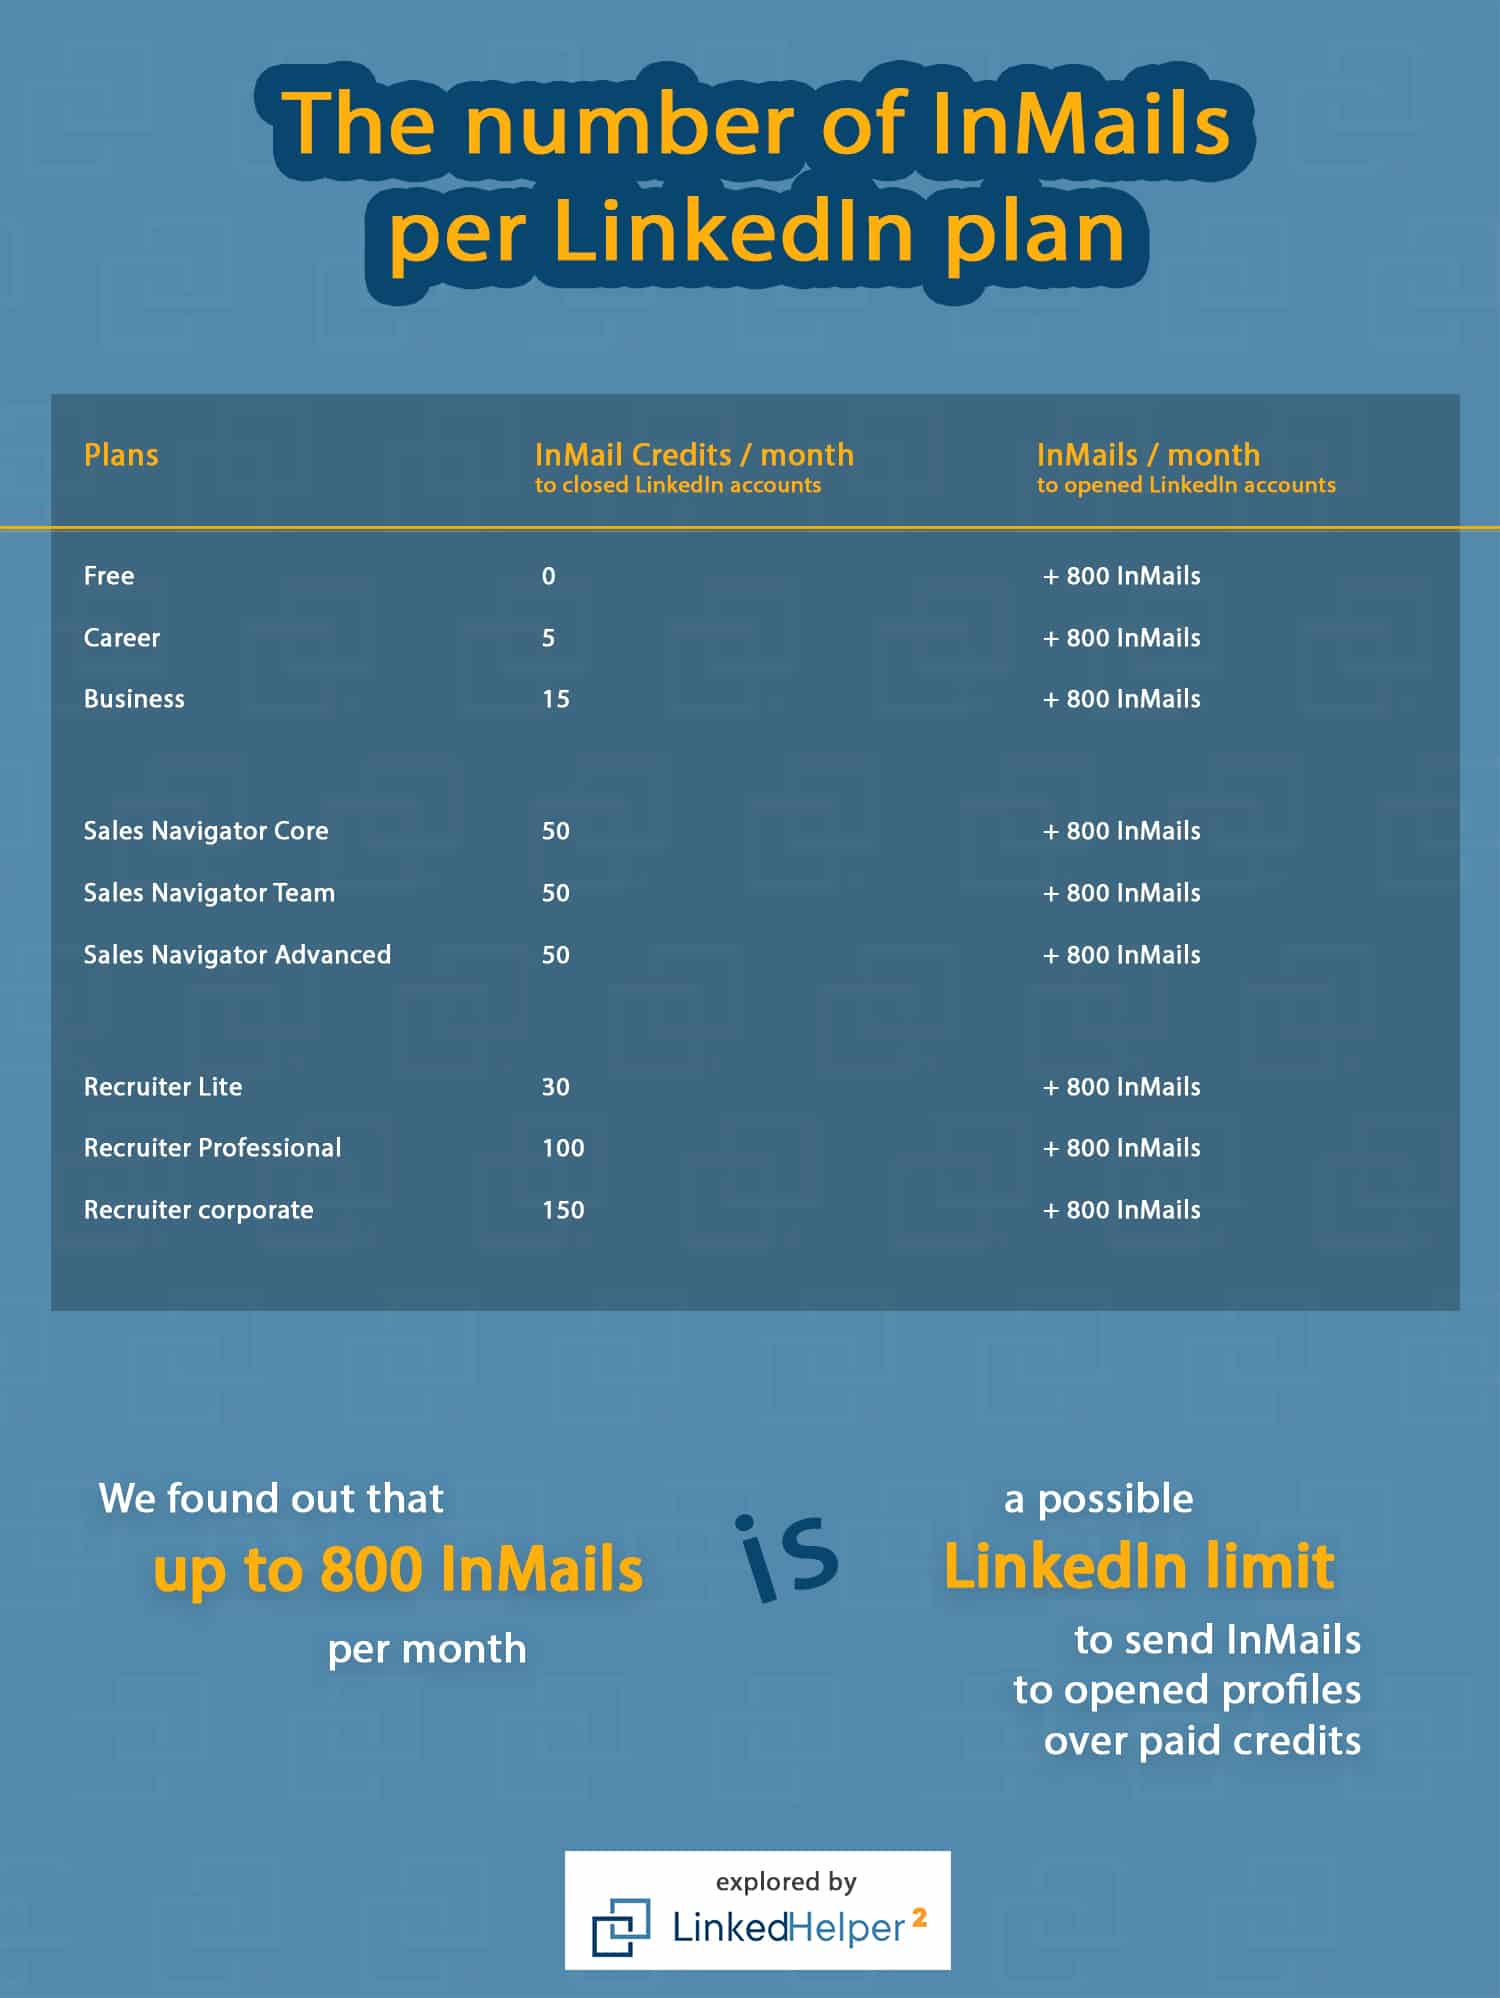
Here’s a breakdown of the monthly InMail message credits you receive based on your account type:
- Premium Career: 5 credits
- Premium Business: 15 credits
- Sales Navigator Core: 50 credits
- Recruiter Lite: 30 credits
However, there’s a workaround to hit the 800 InMails volume we’ve discovered at Linked Helper. If you reach out to members with the Open Profile feature, having LinkedIn Premium, you can actually send up to 800 InMails per month.
LinkedIn says each credit expires after 90 days, so they will carry over to your next month if unused. Yet, you can’t transfer your credits when upgrading your account.
How to get LinkedIn credits for LinkedIn premium accounts?
To acquire LinkedIn InMail credits for LinkedIn premium accounts, follow these steps:
1. Upgrade to a LinkedIn Premium account, choosing from options like Premium Career, Premium Business, Premium Sales, or Premium Recruiter, based on your needs and goals.
2. Depending on your chosen subscription plan, you will receive a specific number of InMail credits as part of your premium features.
⚠️ Warning: Keep in mind that if you cancel your premium subscription, your credit balance will reset to zero.
How to claim back your LinkedIn InMail credits?
While LinkedIn doesn’t have a formal refund policy for InMail credits, there is still a bypass to claim them back. According to LinkedIn’s guidelines:
“Every InMail message that is accepted/declined or responded to directly within 90 days of it being sent is credited back. A pending InMail message isn’t counted as either accepted or declined. As part of the LinkedIn messaging experience, Quick Replies to InMail messages also count as a response”.
This means that even if the user clicks on the quick reply option in the chat, this will also be considered as a reply to the InMail. Thus, your InMail will get credited back.
You can accumulate a maximum of InMail message credits 60 days after a subscription starts, but you can send as many InMails as many of them are credited back.
This is the maximum number of InMail message credits you can accumulate in total:
- 15 messages with Premium Careers
- 45 messages with Premium Business
- 150 messages with Sales Navigator
- 120 messages with Recruiter
What are the limitations of InMail messages?
InMail messages can be a powerful tool to reach targeted leads, but they also have drawbacks. For instance, LinkedIn doesn’t permit sending a follow-up message if the user didn’t respond to the first message in InMail.
If the prospect doesn’t get back to you, you must send them a connection request and initiate a contact.
Access 800 InMails to double your outreach results.
With LinkedIn’s Open Profile Premium feature, you can access around 800 InMails to maximize your outreach results. This powerful feature enables you to contact LinkedIn Premium members for free, even if they are not in your network.
All LinkedIn members can see the full profiles of Premium members who have enabled Open Profile. However, it’s important to note that you must have a Premium subscription to be an Open Profile member.
To save massive time on identifying and connecting with open profile owners, use Linked Helper 2.
With Linked Helper, you can easily find users with open profiles in a click ⚡and create bulk InMail campaigns directly within the tool. Here is the step-by-step guide on how to do it:
- First, download Linked Helper. You can create a free account for 14 days.
- Log in to your profile and link it with your LinkedIn.
- Create an outreach campaign.
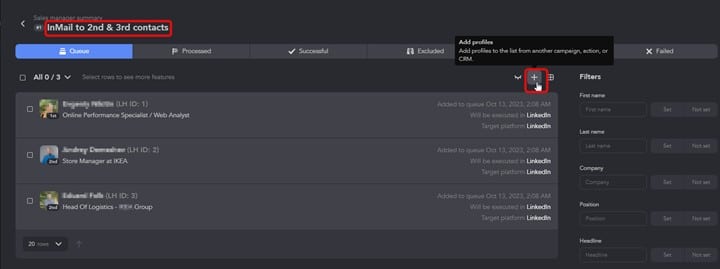
- Add profiles to the Queue list. (Workflow → Queue → Add).
- You can only sort people with an Open profile status if you select ”Services” in the Advanced filters. Also, when scraping through the Navigator, you can filter such profiles directly in the Linked Helper CRM by the “Open link” filter.
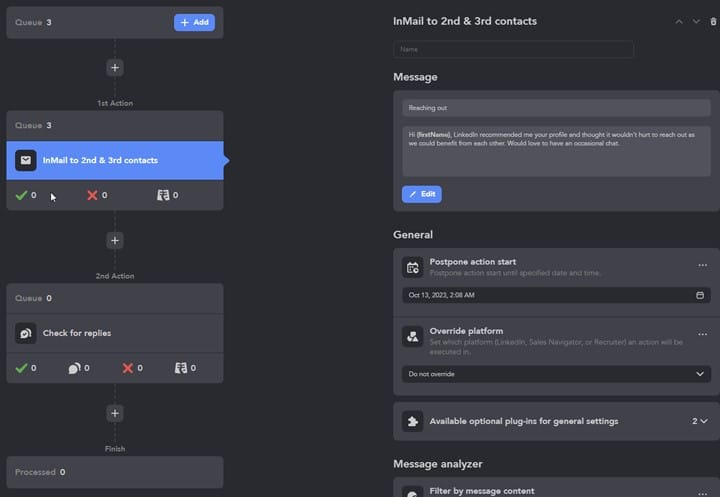
- Add the “InMail to 2nd & 3rd contacts” action.
- Add text and personalization. Personalize messages using built-in or custom variables.
Next, add the “Check for reply” action. The tool will track all users who reply to your InMail. Once the campaign is complete, you can download the history of messages and replies in an Excel format for thorough analysis.
Linked Helper’s automation is super convenient in such cases. Give it a try now.
Download Linked Helper 2
and get 14-day free trial right now
DOWNLOADIf you are not yet in our list of users, then join.
We give you a trial version to start your experience with our LinkedIn tool.
4 hacks to level up your LinkedIn InMail outreach strategy
To improve the efficiency of your InMail outreach, implement these four actionable tactics.
#1 Write shorter InMails to get your message across quickly.
Long intros overwhelm the readers — and you, too. Ensure your message is concise and unveils your intentions quickly.
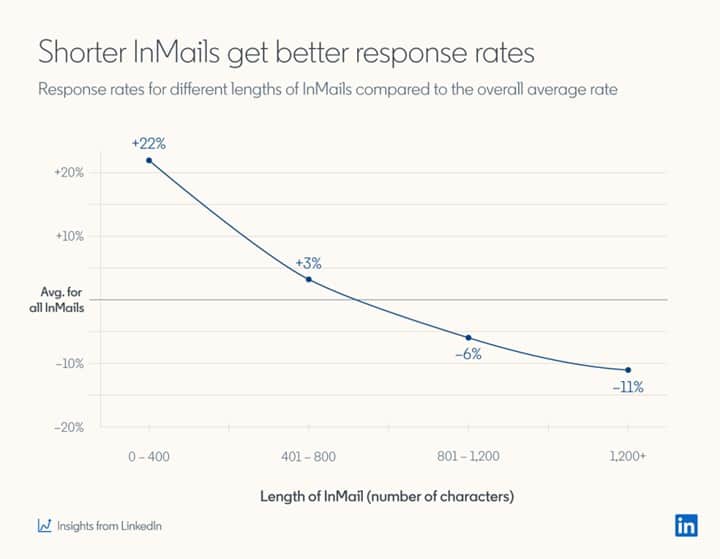
Begin with a friendly greeting, briefly introduce yourself, and explain why you’re reaching out. If possible, keep the text under 30–400 words to increase the response rate.
LinkedIn’s study suggests that InMails under 400 characters perform 22% better than lengthy messages.
#2 Add a call-to-action for higher conversions.
Every InMail should have a clear goal. If the recipient doesn’t understand what’s expected of them, chances are low that you’ll ever get a reply. Whether it’s requesting feedback, scheduling a meeting, or arranging a call, state your CTA clearly.
For example, if you want a prospect to join the conversation, end your InMail with this sentence —
“[FirstName], let me know your thoughts on X?”.
This way, you’re guiding the recipient on the next steps and controlling the conversation without coming across as annoying and intrusive.
#3 Launch a warm-up sequence to increase the response rate.
🔥Users are 78% more likely to accept your InMail if you view their LinkedIn profile first. Furthermore, prospects are more responsive to InMails if you browse their profile several times within 30 days. If you don’t want your InMail outreach to look like a cold call, develop a sequence of warm-up actions.
For example, engage in their recent posts, comment, start discussions, and like posts you enjoyed. This approach engages your leads in a conversation and provides a solid foundation for lead nurturing.
Next, follow up with a value-driven message to convey your initiative.
Pro tip: Use Linked Helper to automate the warm-up process by automatically visiting, following profiles, endorsing skills, inviting to events, liking, and commenting on posts or articles.
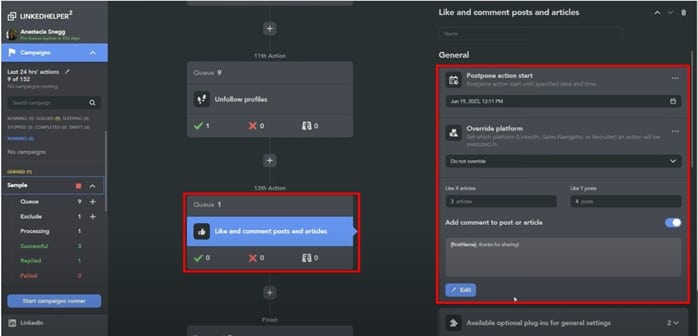
Linked Helper allows you to choose the number of posts and articles to engage with and postpone these actions. The latter is handy for grabbing the attention of leads living in different time zones.
#4 Write compelling subject lines.
Catchy subject lines can prompt the recipient to open and read the message. Avoid using generic lines like “networking opportunity” or “mutual growth.”
Be specific and highlight the value they’ll gain from opening your message. Keep subject lines under 200 characters to avoid excessive length. Add personalization or time triggers. For this, you can use Linked Helper’s variables to generate custom strings.
Here are 3 great LinkedIn InMail subject line examples:
Example one: “A job opportunity from [Company] for Amanda.”
The subject line is clear and concise and includes the name of the recipient.
Example two: “Loved your post on AI marketing trends.”
It shows genuine interest and gives the recipient the impression that it’s crafted specifically with them in mind. Also, it sparks curiosity.
Example three: “Saw you at the webinar [Name] — let’s exchange ideas?”
The subject line has a clear CTA and swiftly establishes a mutual connection by referencing a shared experience.
Pro tip: Evaluate which email subject lines work best for your email newsletter – these may be suitable for your InMail subject lines as well.
LinkedIn InMail FAQs
Still have questions about InMails on LinkedIn? Check this session out to find answers to the most common questions from our users:
Can you see if a LinkedIn InMail has been read?
Whether you can see a LinkedIn InMail has been read or not depends on the recipient’s privacy settings. If the user chooses to hide the “Read” status, it will remain unknown to you.
You can access InMail statistics in your LinkedIn reports, but they primarily focus on the response rate and the number of sent and accepted messages.
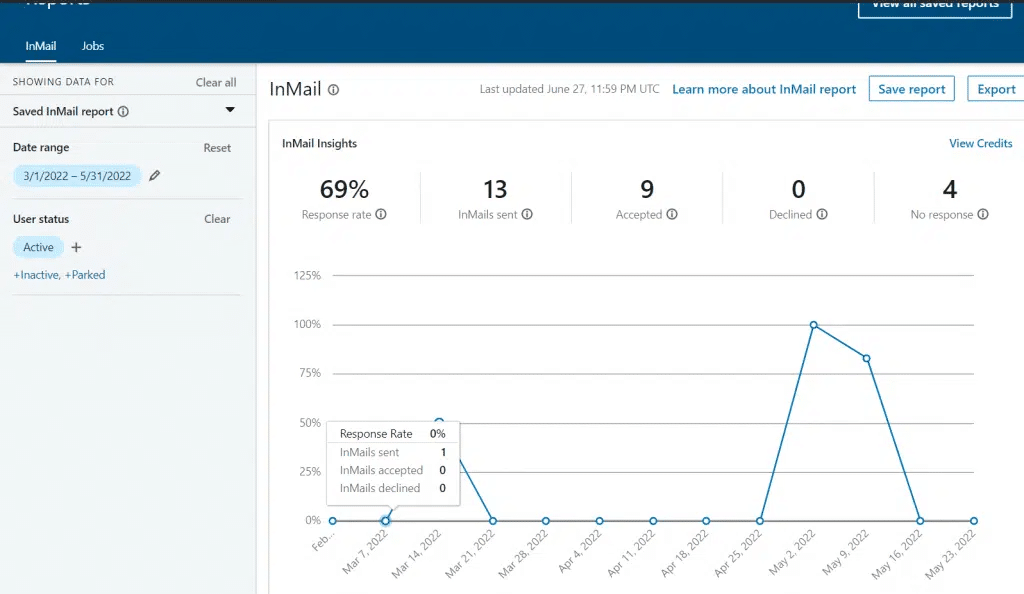
What does a “declined InMail” status on LinkedIn mean for senders?
When a user receives an InMail, they have the option to click “Decline.” When this happens, you can no longer contact that user. The positive side is that LinkedIn will return that InMail credit to you.
Can I create LinkedIn InMail templates for bulk messaging?
Recruiter plan users can create message templates and save them for future use. Those templates can also be shared with other LinkedIn users.
To create a LinkedIn InMail template, follow these simple steps:
- In your personal account, find the menu item Product settings. Select Message templates → Create new.
- Enter text to set a title and add media files as needed.
- Set the privacy of the template – you can make it visible only to yourself or to all users from your organization.
To send a message from a template, in the “Send Message” window, select the Envelope icon → Document icon → find the desired template by name from the list.
Bonus: In the Linked Helper Template Builder, you have additional options for personalization. You can use not only built-in variables but also custom ones. You can write values in Excel and load them into the software to create custom variables. Additionally, auto-messages can be personalized thanks to the “IF, THEN, ELSE” functions.
Watch the video to learn more about the feature.